64 Beetle Project
Image Gallery


Who should read this article? Absolutely everyone!
If you’re a VW fan, it’s filled with pictures, arcane VW lore, technical “how to” and it’s about your baby.
If you’re a casual reader hopefully the humor will grab you. Did you know:
- Wives and girlfriends create more automotive distraction than any other single cause?
- Swearing can be beneficial?
- I almost got sued by HAMA (The Hamster Association of Massachusetts) in the writing of this article?
- The Beetle may have been directly responsible for Custer’s Last Stand?
If you’re technically oriented read about the new world of Digital Storage Oscilloscope testing. Motor Works just shelved its mechanical compression gauges.
I can’t see how anyone wouldn’t want to read this article (including children five years and under), but of course I’m biased. I wrote it. Enjoy, and if you don’t like it don’t tell me. I can’t handle rejection. (smile)
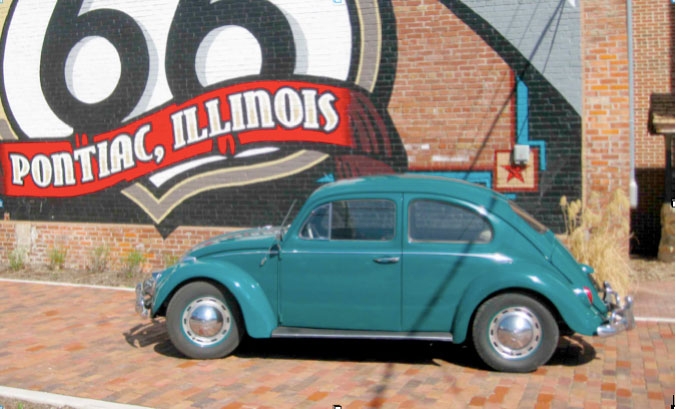
Motor Works recently completed a large project on a 1964 VW Beetle. It was a labor of love from the beginning as are all our Classic Cars. The “Bug” was in need of repairs both large and small. Some of these repairs were common; however others required the highest degree of imagination, skill and fabrication. A list of repairs and the rest of the article follow after the picture just below. We won’t be discussing all of them; after all how interesting is it to replace a turn signal switch? But, we will be going into depth on the more interesting aspects.
Now, on to the project.
List of repairs:
- Replace turn signal switch
- Replace rear engine cover latch
- Repair lights
- Replace window regulator
- Replace heater control cables
- Complete brake job with master cylinder replacement
- Replace rear axle seals and wheel bearings
- Replace complete front axle assembly
- Perform a major tune up
- Adjust the valves
- Replace the transmission
- Repair slow cranking engine by converting original 6 volt system to 8 volts
- Repair major engine hesitation under acceleration: Install custom distributor with vacuum and mechanical advance Rejet the carburetor
- Rebuild rusted out defrost ducts from the rear heat exchangers forward to the dash
Brakes: Older classic cars commonly have four wheel drum brakes. Braking was marginal on some of these cars right off the showroom floor. DO NOT CUT CORNERS when restoring the braking system on these old cars or you may find yourself on a first name basis with a phone pole.
1. Use top quality friction material on the shoes.
2. A brake shoe is bent or arced to mate properly to a drum with an inner diameter of 9.06 inches (1964 Beetle new drum spec). As the drum wears (or is machined) the inner diameter grows. This means the brake shoe arc is too small resulting in poor shoe-drum contact and cruddy braking. Carefully measure the drums with a brake micrometer. If they are even close to a maximum refinish spec of 9.11 inches, replace them.
3. Always replace all springs, caps, and pins. They weaken due to rust or metal fatigue and can cause catastrophic failure of the brake when they let go.
4. Don’t reuse old brake hoses. They breakdown and flake internally while looking fine on the outside. This can cause a restriction creating a “dragging” or partially applied brake.
5. Free, clean and lube the manual adjuster star wheels. If the wheels are rounded off (common) replace them.
6. Replace the wheel cylinders, do not overhaul them. Brake fluid is hydroscopic (absorbs water). The moisture it absorbs from the atmosphere causes brake components to rust and pit internally. This pitting makes even freshly honed wheel cylinders fail prematurely. Moisture also lowers the boiling point of brake fluid, creating major fade problems during heavy prolonged braking.
7. It is a given you are going to clean, inspect and repack the front wheel bearings and replace the axle seals.
8. Replace the master cylinder on general principles. It is a function of when will it fail, not if. Also, when it fails it can result in one of those unpleasant phone pole interventions.
Little known fact: if you leave a can of brake fluid open overnight, the moisture it absorbs from the atmosphere renders it unsafe to use next morning. I guess you could then call it brake water.
More common fact: the front wheel cylinders on “Bugs” are bigger than the rear wheel cylinders, but they can be mistakenly swapped and they will bolt up just fine in the wrong position. Don’t ask me how I know this but I will admit I learned it the hard way back when I was still an infant in my late 20’s. The problem with the dreaded wheel cylinder swap seems to stem from distraction; the chief culprit being the near proximity of the fairer sex, especially our lovely wives and girlfriends. I have learned the following from many years of experience: if my benevolent wife needs my attention while I am intent upon a difficult repair operation, I must drop everything, change gears in an instant, see to her every need with a dutiful and sincere “yes dear” and then tell her “I love you” as she departs. I say this because, only if my wife is happy will I be able to maintain the serenity and concentration required to avoid the most awful of all awfuls, the most terrible of all terribles, the dreaded wheel cylinder swap.
I sense I am beginning to ramble so back to the article minus all knowledge of forethought, posthaste, with alacrity, zeal, vim, vigor, swiftness, boldness and enthusiasm, or as the British are fond of saying “we will endeavor to persevere”.
Replace rear axle seals and wheel bearings: It’s very common to find a gooey surprise when replacing the rear brakes. You get the rear drums off and find the back axle seals have “let go”; transmission oil is all over everything. What’s worse, age, miles and the leak itself make the rear wheel bearing condition extremely suspect.
Replacing the seals is straightforward. You remove the drum, shoes, bearing cover, a few other parts and the seal is staring you in the face.
Not so simple is the replacement of the axle bearings. They are press fit onto the rear axles. Some books will describe the long, difficult process of removing the rear swing arm so the axle and bearing can be put in a hydraulic press. YIKES!!! If you’ve got lots of time on your hands and really want to learn how to pull the rear swing arms, “knock yourself out” as they say. But, I say again YIKES!!!
On the other hand, if you’ve got a life to live, there is an alternative. You can use the Motor Works Magic VW Beetle Rear Wheel Bearing Pull Off Things (patent pending). For a cool $5000, Motor Works will build a custom set of Pull Off Things just for you. We will even engrave your name on them.
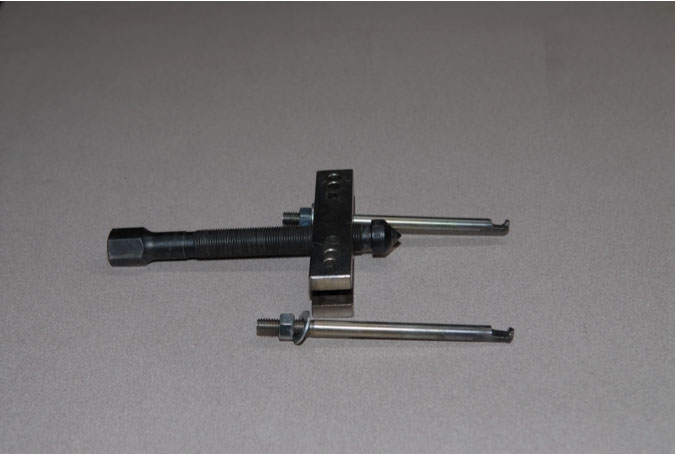
Unfortunately for Motor Works you can also build your own set of wheel bearing internal pullers for about four dollars and change. Using two hardened 6 inch long 3/8 diameter bolts, cut the heads off and notch the end close to where the heads were. Find a ¼ inch piece of angle iron and cut it to about six inches long. Hook the notches of the internal pullers into the wheel bearing 180 degrees apart. Place the angle iron over the axle, mark and drill where the pullers should come through. Install nuts and washers on the pullers. Tighten each evenly until the bearing pulls off.
See photo, (which uses a puller bar and screw assembly instead of the angle iron) it will make it all clear.
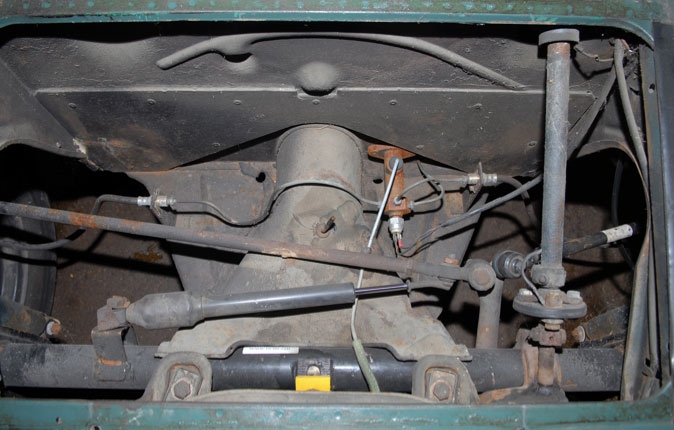
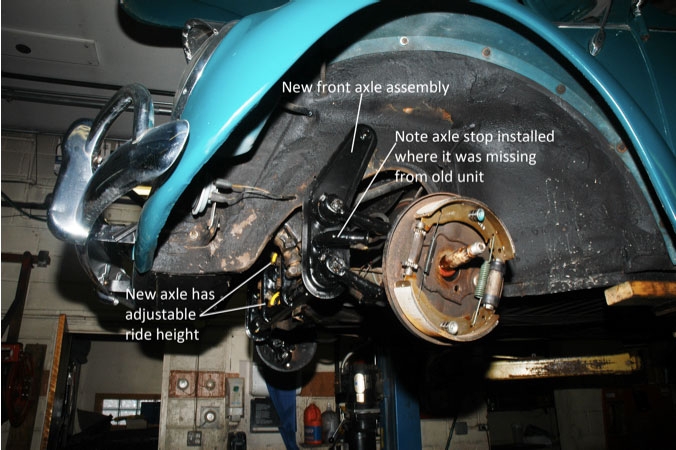
Replace complete front axle assembly: This 1964 Beetle is not the first front axle we have had to replace. A mid 60’s bus proved far more excruciating as it had to be found used and shipped in disassembled. Reassembly of the torsion bars was a challenge. They had to be installed under pressure to get past the axle stop.
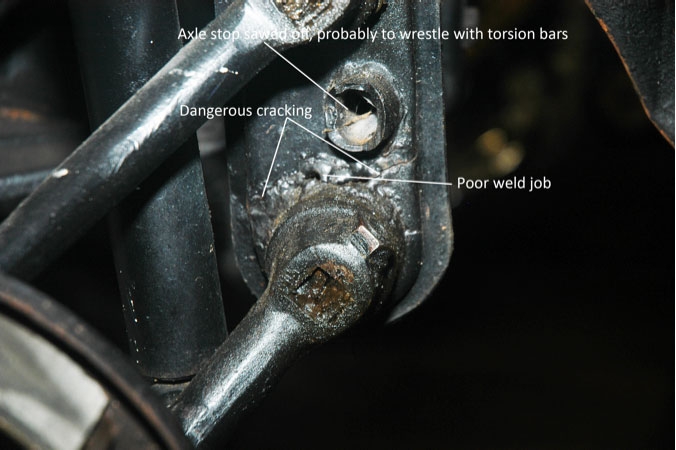
The Beetle came to us with a dangerously cracked front axle that had been poorly welded (see photo). A remanufactured complete unit was located and installed. There is not a lot to say about installation other than the axle is large, heavy and the old bolts were seized with rust. Typical stuff on a classic car.
Important Note: a critical part of the skilled craftsman’s toolset is the occasional expletive deleted muttered under one’s breath. If used quietly, judiciously and wielded with the precision of a surgeon’s scalpel it has been known to help “lubricate” the disassembly-reassembly process. “Rats, crumb, darn, heck” and occasionally “hamster piss” are all acceptable phraseology. If these tools are abused however, they can have quite the opposite effect and can even induce long facial hair and knuckle dragging.
Critical Note: I’ve just been informed by my lawyer from the legal firm Cash, Only and Now that I may have offended a small but very influential minority group; HAMA (The Hamster Association of Massachusetts). They suggest an immediate public apology, so I will issue the following statement: To all Hamsters far and wide who may have been harmed by their mention in the previous paragraph, I now issue my sincerest amends plus the $1.43 I have in my pocket. I give my solemn oath to treat hamsters with respect and dignity and will refrain from even mentioning the word hamster for the next 48 hours.
Hamster, Hamster, Hamster! Oops!...I Did It Again (Britney Spears, May 30, 2000)
A year later the axle had developed some looseness at the link pins. This is the area where wheel alignment is adjusted. We ordered in a shim kit, reset everything to spec and covered it all under warranty for our customer. (See photo).
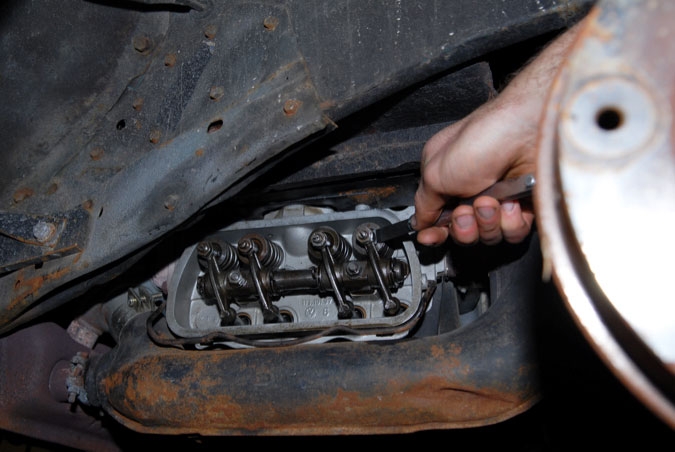
Performing a major tune-up, Valve Adjust: Tuning up a 1964 air cooled Beetle engine is not hard but it is a little quirky. Maintenance is critical to the longevity of the motor. Also, there is a specific order many of the operations need to be done in.
The first thing we addressed is adjusting the valves. (See photo). They are set on a cold engine. (Cold means having sat for at least 6 hours.) The actual process is not difficult and we won’t bother to detail it here. However, there are two important issues with air cooled VW valves:
The first is adjustment interval. The valves need to be adjusted every 3,000 miles without fail. Air cooled engines run hot and the metallurgy 45 years ago was only slightly improved over that of the Mesozoic Era when dinosaurs roamed the earth. Engine valves cool when they are shut. As valves wear their clearance usually lessens. This means they stay open too long, fail to cool properly and burn.
The second issue is the specification for valve clearance. There are a number of different published specs and opinions have differed for many years as to which number is the best to use; .004, .006 and even .008 are all listed. The problem is so severe that a few historians (like me) believe the recent “dustup” between General George Armstrong Custer and Crazy Horse at the Little Big Horn may have started as a polite difference of opinion about valve specs and simply got out of hand. Crazy Horse, long a proponent of the .006 specification, seems to have settled the issue quite decisively. That is why Motor Works today uses the .006 valve clearance spec on all its air cooled VW’s.
Compression: I am amazed how many of our customers drive air cooled VW’s that don’t run well. These cars miss, hesitate, idle rough and are down on power. My personal opinion is that owners are unfamiliar with how well a Beetle can run, and if asked they would say “that’s how it has always run”.
Compression is a quick window into the mechanical health of the engine. If it is off, all the tuning in the world isn’t going to help. And remember, air cooled engines burn valves.
We tested compression on our 64’ with the following method. Warm the engine after the valve adjust. Remove all the spark plugs. Block the throttle wide open. Install the compression gauge and crank the engine for 8 pulses. Testing revealed the following: all cylinders had between 100 and 120 psi of compression. In an ideal world this engine in top condition (with its 7.00:1 compression ratio) would probably have 130 psi in all cylinders. The rough rule of thumb has always been no two cylinders should be over 20% different from each other. The bottom line is this motor is still serviceable and should run well with proper tuning.
Technical note on cranking compression: Motor Works will soon be shelving its old fashioned mechanical compression gauges in favor of DSO (Digital Storage Oscilloscope) testing. Using a pressure transducer we are now seeing each separate compression pulse as a waveform. The height and variance in pulses plus the scope’s min/max feature allow us to view valve and cylinder sealing in ways we never could before.
This is just the tip of the iceberg. DSO’s, long used for diagnostics of electronic sensors and ignition can now quickly diagnose other engine mechanical problems.
- A DSO with a high amp probe, reading starter pulses, can perform a relative compression test singling out a low cylinder.
- A DSO with a vacuum transducer, reading intake manifold pulses, can spot a bad valve in a specific cylinder.
- A DSO with a vacuum transducer can test running compression. This allows determination of which valve is burnt or if crank to cam timing is off. It can also calculate how far off the valve timing is. This allows diagnosis of whether a timing belt is a tooth off or if a camshaft phaser is stuck; all great info to have before tearing down an engine.
- A DSO with a pressure transducer, reading fuel pressure pulses, can spot a single failed injector.
Motor Works is still learning. As we ramp up our experience we will discuss these exciting new diagnostic procedures
in other articles.
It seems like I haven’t told a joke in a while so I’d best get it out of my system now.
Did you hear the one about the two hamsters who were building a house? One hamster was counting nails into two piles. The other Hamster came over to the first and asked him “What are you doing”? The first hamster replied “I’m sortin nails into two plies. One pile for the good and the other pile for the bad”. “What’s bad about em”? queried the second hamster? “The nails in the bad pile all have the heads on the wrong end” responded the first hamster. “NO STUPID!” the second hamster yelled. “You use those nails on the other side of the house”!
Boy, do I feel better. Hamster, Hamster, Hamster!
I must appoligize to my readers at this point, but the remainder of this article is still under construction. Please stop by often to view additional chapters.